文本末尾添加“/usr/local/lib”,按下Ctrl + O,回车保存修改,Ctrl + X退出修改(Add “/usr/local/lib” in the text end,push “Ctrl + O” and “Enter” to save modification,and push “Ctrl + X” to exit)
1.You can choose other version OpenCV,but it maybe generate other compile issue because of compatibility,you can find other version OpenCV library on their official website(https://opencv.org/),or search on SourceForge(https://sourceforge.net/).
2.The speed of compiling OpenCV library will a little slow,please wait patiently.
3.If you dp it on RPI or other minitype devic,the device maybe generate system jammed issue because of performance,now,you need power off the device and restart it and continue to compile.
4.If you dp it on RPI or other minitype devic,please pay attention to heat dissipation.
4.安装Qt Creator (Install Qt Creator)
$ sudo apt-get update
$ sudo apt-get upgrade
$ sudo apt-get install qt5-default
$ sudo apt-get install qtcreator
注:
1.若树莓派下执行第一步update时提示404 Not Found,需要修改本机DNS(If system note “404 Not Found” issue when execute “sudo apt-get update” on RPI,you need modify device DNS),
$ sudo nano /etc/resolv.conf
修改127.0.1.1为8.8.8.8,Ctrl + O,回车保存修改,Ctrl + X退出修改(Modify 127.0.1.1 to 8.8.8.8,push “Ctrl + O” and “Enter” to save modification,and push “Ctrl + X” to exit)
$ service network restart
2.多数情况下Qt Creator安装好后会自动配置好编译器套件,不过有时也会发生编译套件未配置或配置出错的情况,需要手动检查一下,检查方法如下(In most cases,Qt Creator will auto configure compile kits after install,but somtimes,an unconfigured or misconfigured build suite will occurs,so you need check it by yourself,the method of check as follow ):
$ sudo qtcreator
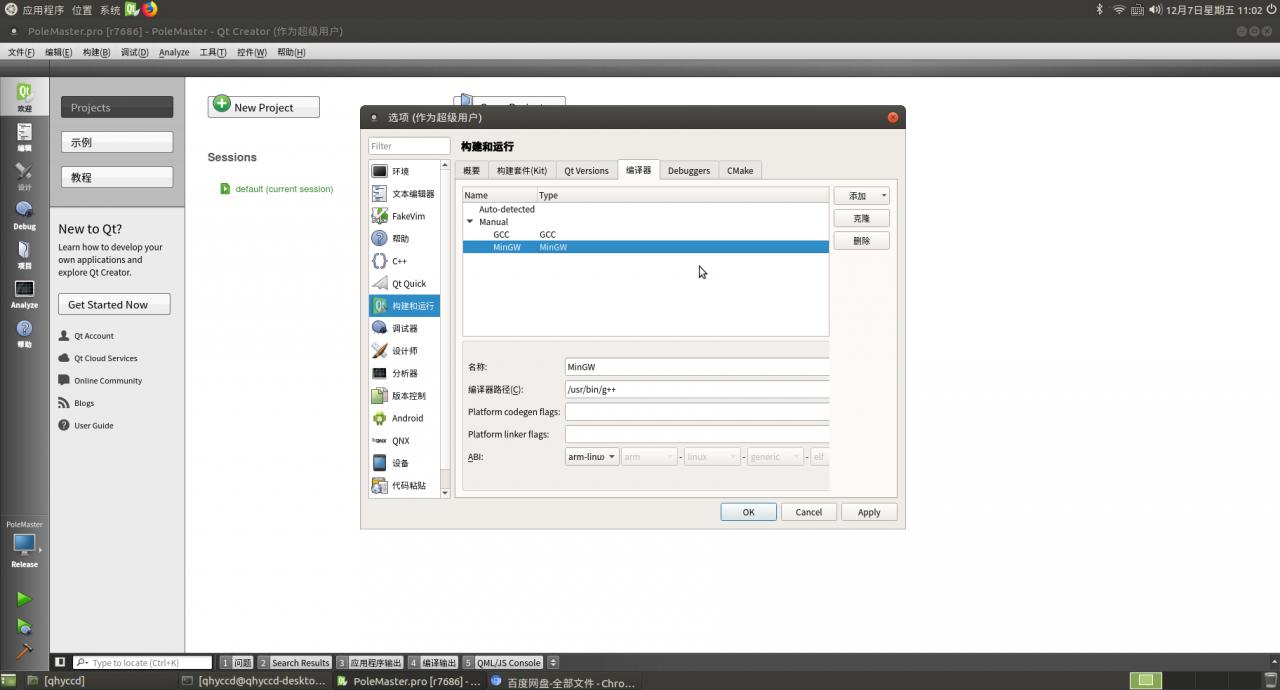
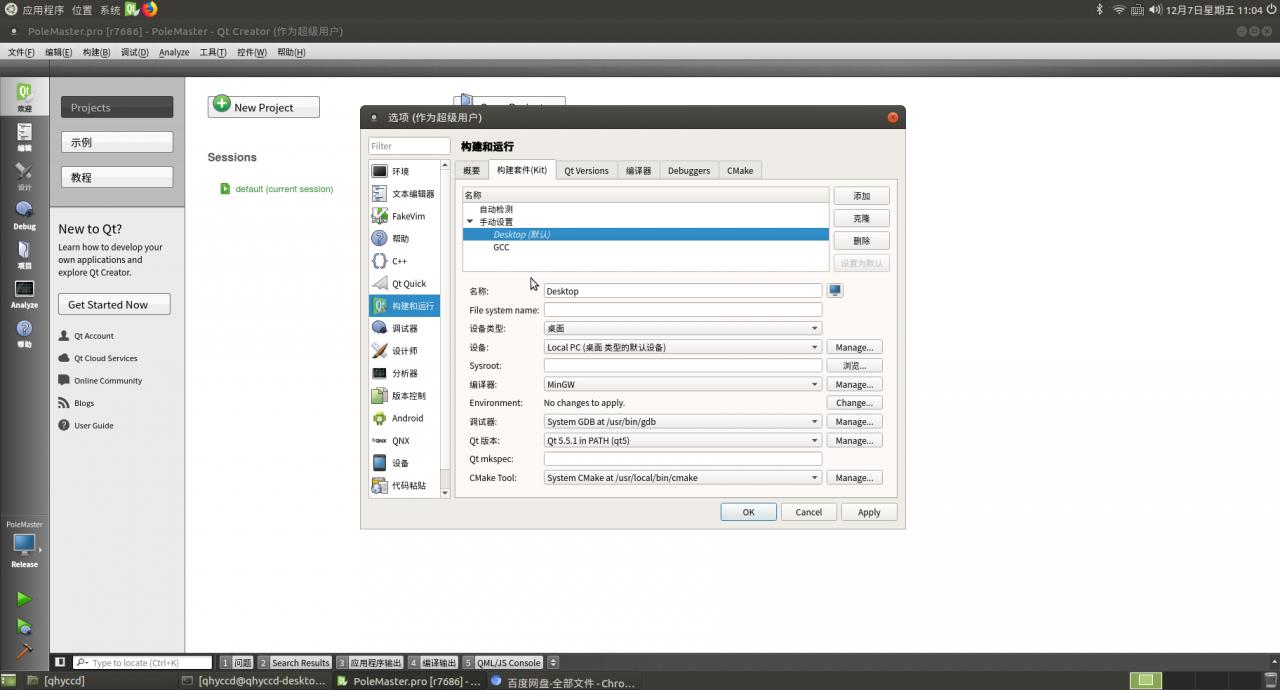
程序运行起来之后点击工具(Tools)-> 选项(Options)-> 编译套件(Kits),查看编译套件是否有错误提示,如果有请按照如下步骤配置编译套件(After Qt Creator has been run,click Tools->Options->Kits,check if the kits has error note,if has error,please configure kits as follow),
1.设置编译器:点击添加选择MinGW,选择g++编译器的路径,ABI选择arm-linux-guneabihf-elf(Setup compiler:click Add and select MinGW,choose teh path of g++ compiler,ABI choose arm-linux-gnueabihf-elf);
2.设置编译套件:编译器选择刚才设置好的MinGW,选择调试器(Setup compile kits:choose the MinGW you setuped just now to be compiler,and choose debuger);
5.下载并安装QHYCCD SDK(Download and Install QHYCCD SDK)
请根据自己使用的Linux版本下载对应版本的SDK,可以通过”uname -a”命令查看所使用的Linux版本(Please download the corresponding version of the SDK according to the Linux version you are using. You can check the Linux version used by the “uname -a” command.),
若结果为x86_32,则对应Linux (If the result is x86_32, it corresponds to Linux);
若结果为x86_64,则对应Linux_x64 (If the result is x86_64, it corresponds to Linux_x64);
若结果为armv7l,则对应RPI3 (If the result is armv7l, it corresponds to RPI3);
若结果为aarch64,则对应AARCH64 (If the result is aarch64, it corresponds to AARCH64)。
此次以armhf为例(This time with armhf as an example),
$ tar -xvf RPI3_qhyccd_V20191115_0.tgz
$ cd RPI3_qhyccd_V20191115_0
$ chmod 777 *.sh
$ sudo ./install.sh
6.下载EZCAP_Qt源码并编译(Download EZCAP_Qt source code and compile it)
Qt Creator程序运行起来之后需要进行以下操作(After running the Qt Creator program, you need to do the following):
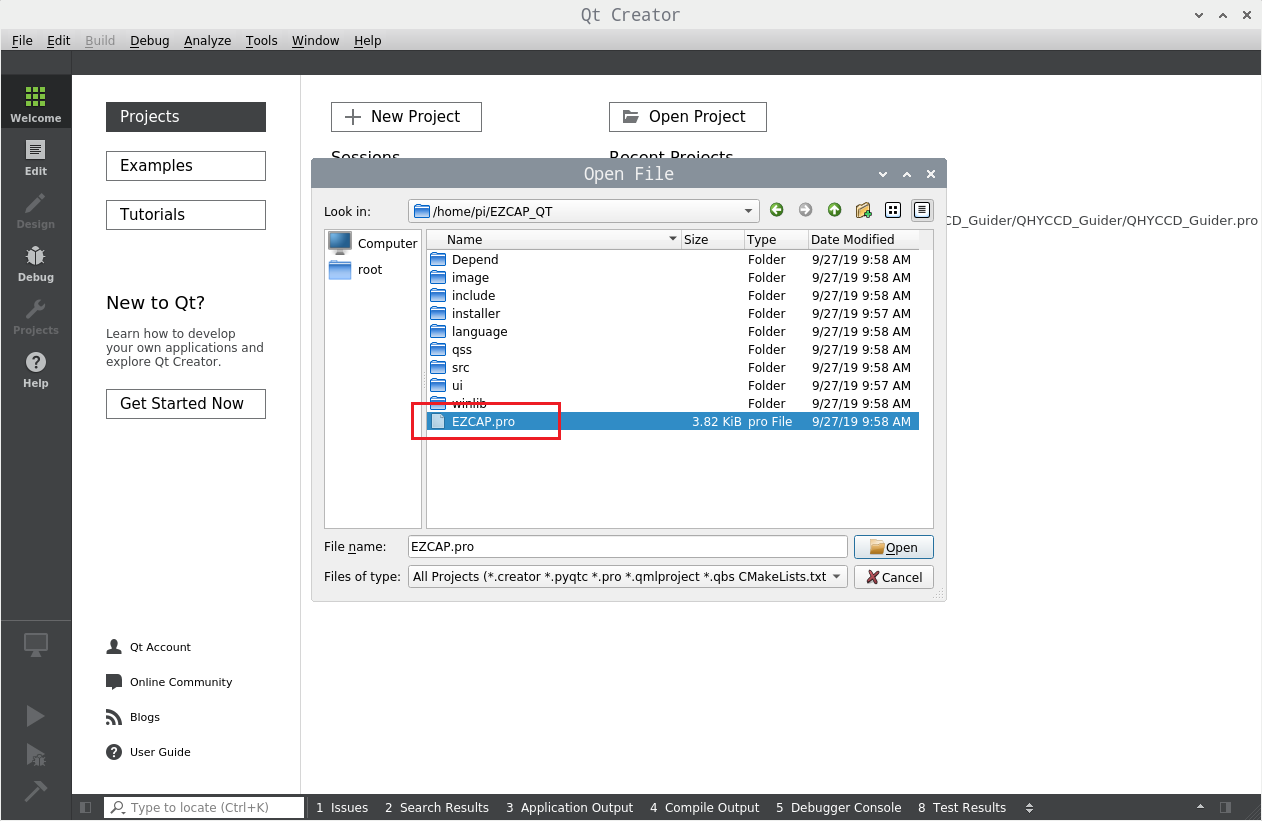
6.1 点击文件(File)->打开文件或项目(Open File or Project),进入刚才解压得到的EZCAP_QT目录,找到EZCAP.pro文件并打开(Click File->Open File or Project,enter the EZCAP_QT directory that was just extracted)
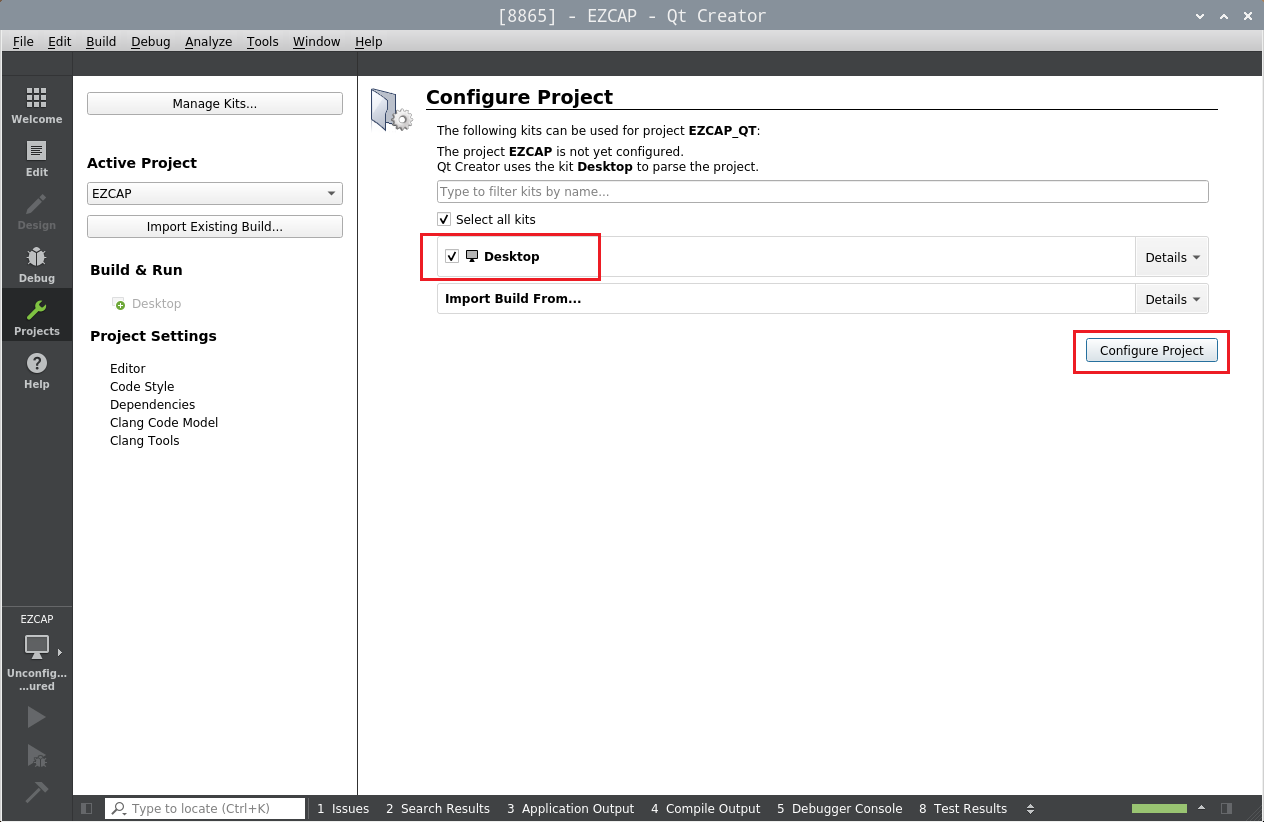
6.2 选择编译套件,点击Configure Project按钮(Select the build suite and click the Configure Project button)
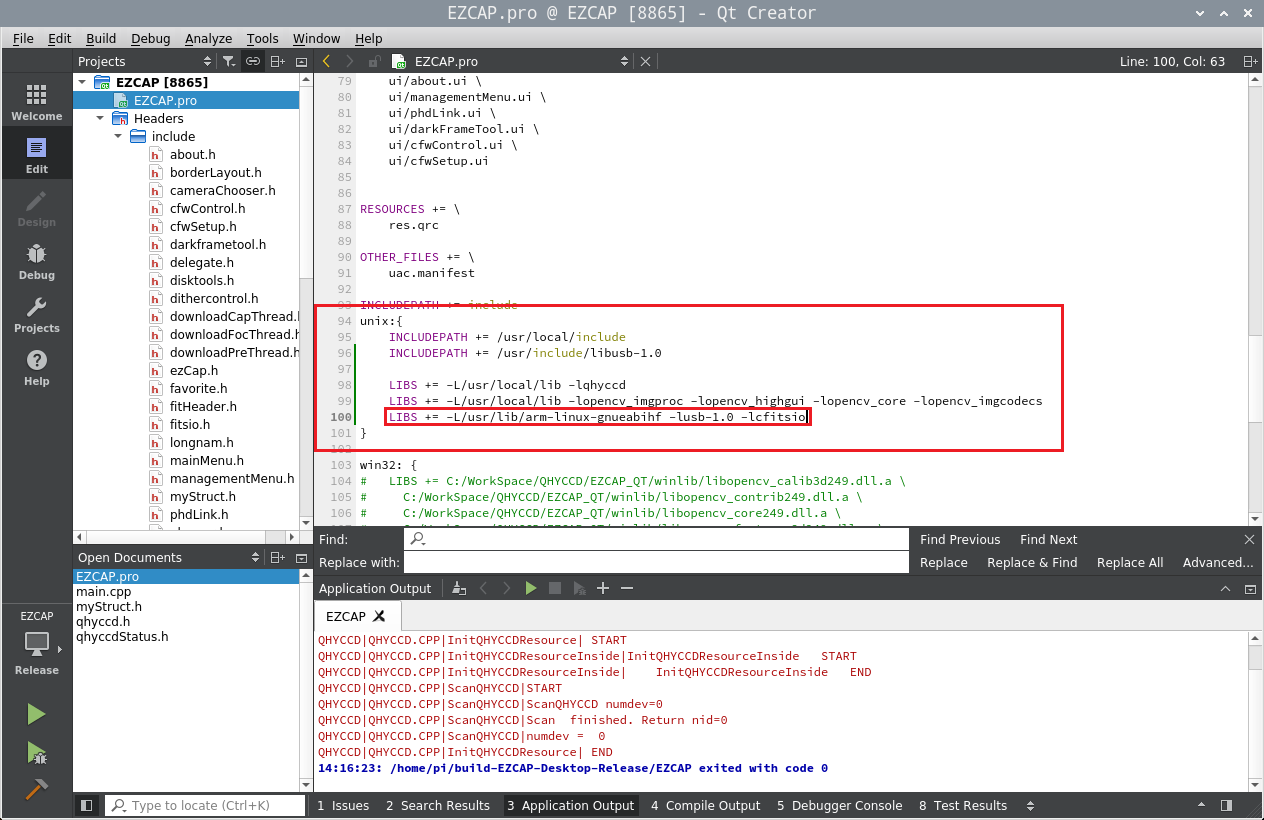
6.3 打开并修改EZCAP.pro文件(Open and modify EZCAP.pro file)
1.INCLUDEPATH is the location of the header files. The header files of QHYCCD SDK and OpenCV will be saved to the /usr/local/ include directory after installation; the header files of libusb-1.0 need to be passed “sudo find / -name libusb.h”. Find the location of the file and modify it accordingly.
2. LIBS is the location of the library files. Both the QHYCCD SDK and OpenCV library files are installed in the “/usr/local/lib” directory. The locations of the cfitsio and libusb-1.0 library files are stored in the system library directory.
The path of armv7l is /usr/lib/arm-linux-gnueabihf;
the path of aarch64 is / usr / lib / aarch64-linux-gnu;
The path of x86_32 is / usr / lib / x86_32-linux-gnu;
The path of x86_64 is / usr / lib / x86_64-linux-gnu;
You need to modify it according to the actual situation. The above picture uses armv7l as an example. If it is an aarch64 device, you need to modify it to “LIBS + = / usr / lib / aarch64-linux-gnu -lusb-1.0 -lcfitsio”.
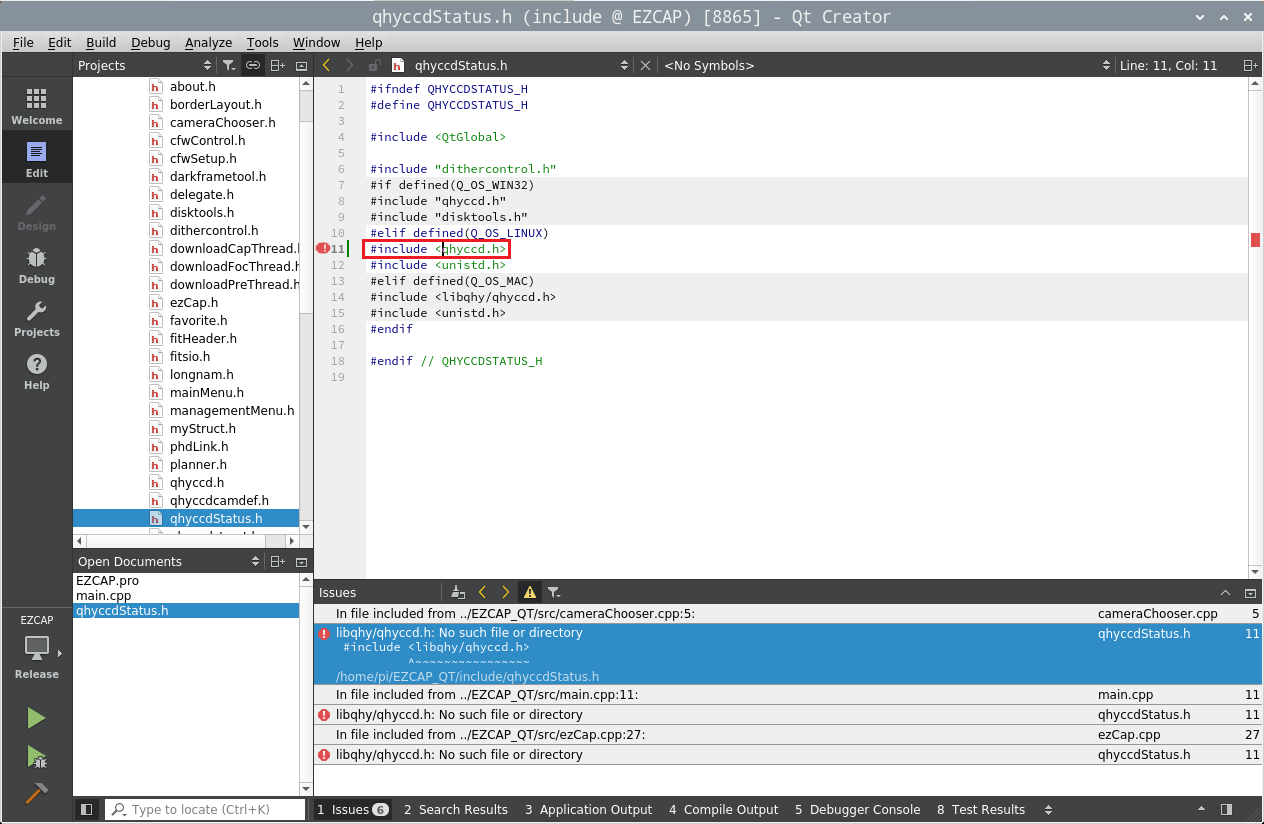
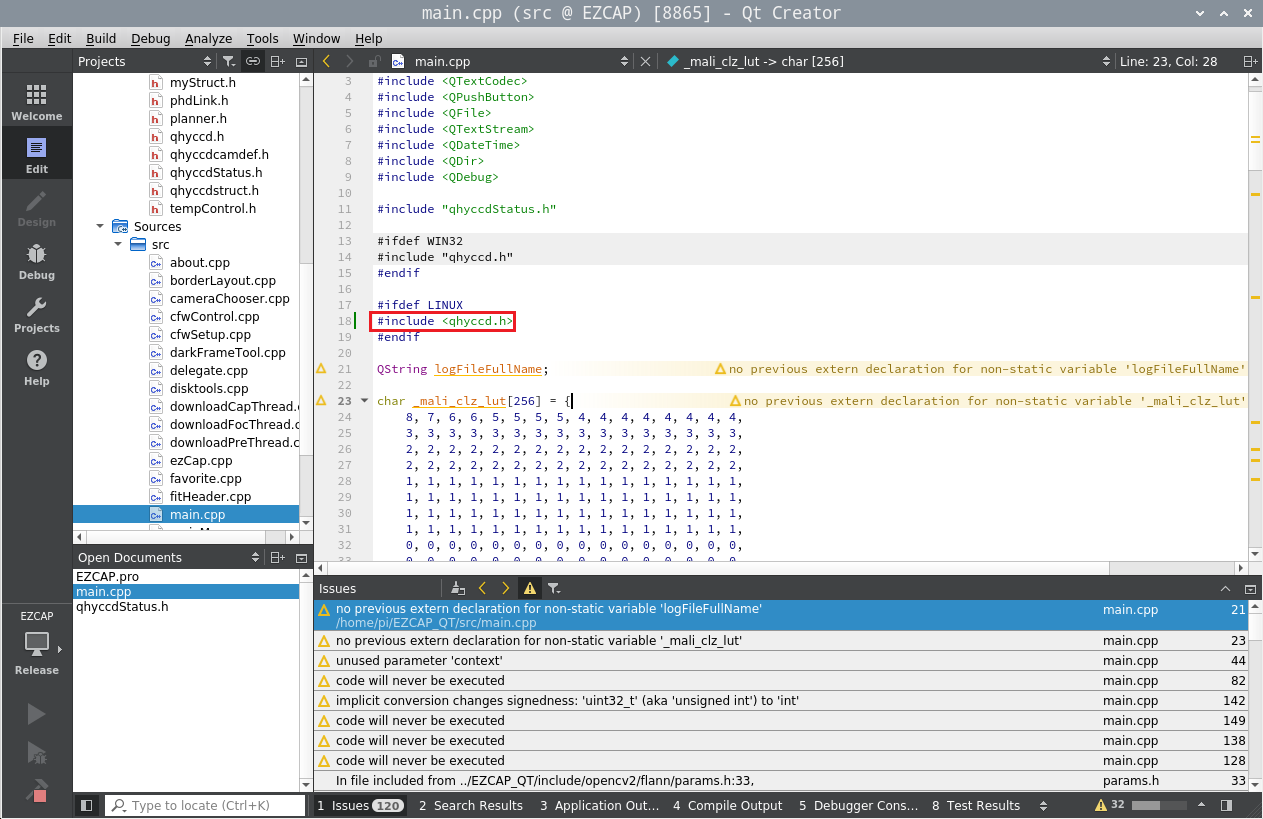
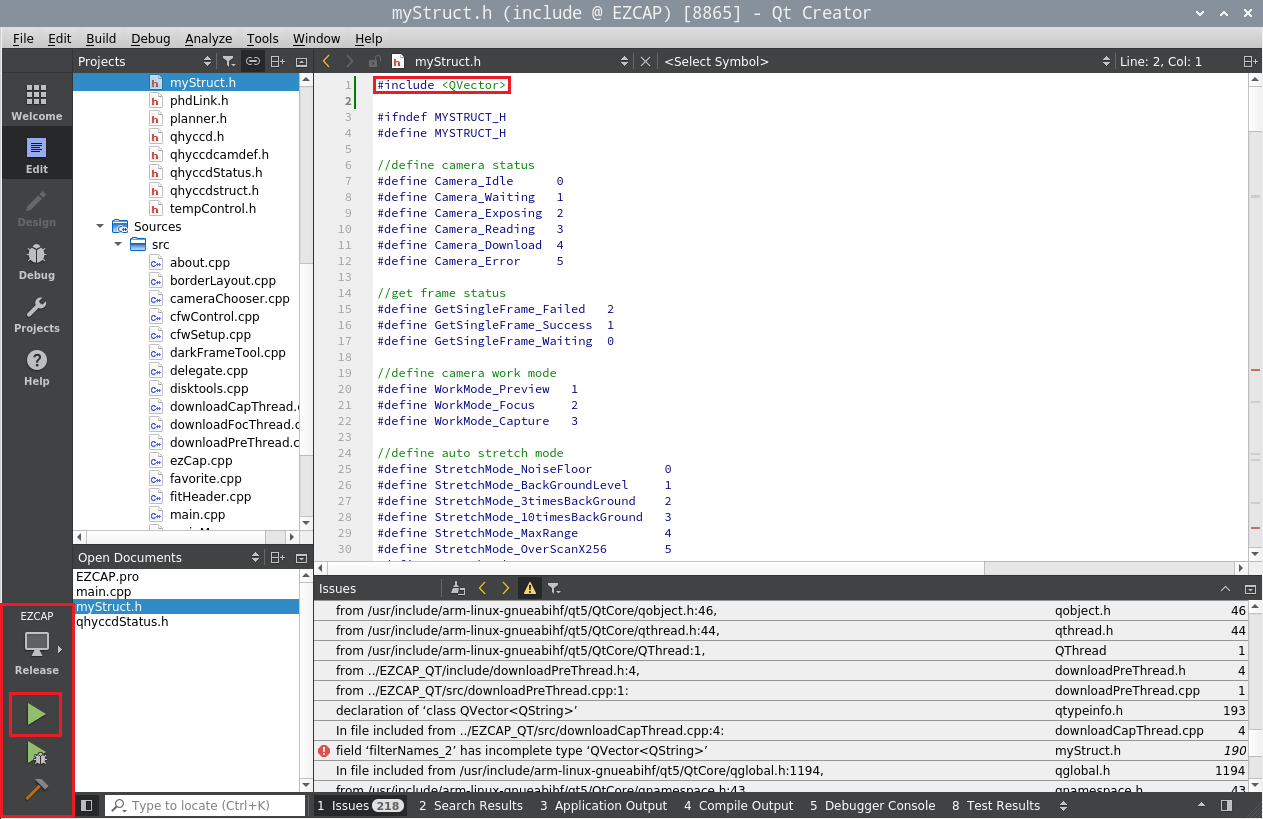
6.4 按照下图修改qhyccdStatus.h、main.cpp和myStruct.h三个文件,修改好后在左下角选择Release模式,点击编译按钮开始编译(Modify the three files qhyccdStatus.h, main.cpp and myStruct.h according to the following figure. After modification, select Release mode in the lower left corner and click the compile button to start compiling)